Showing posts with label Weathers. Show all posts

Friday, 21 January 2011

2 weeks, late nights, and a lot of ruffles

It was a different project to what I’m used too, instead of lots of time on one outfit with a decent amount to spend or a decent amount donated for a very special occasion. This time I had to be very quick, and spend as little as possible.

I like to make my corsets to the best standard I can, hand sewing the bias-binding etc, because of the time constraints I had to machine stitch the bias-binding, and it actually made me cringe to do it. It was very satisfying to see everything come together so quickly though.

Thursday, 8 July 2010

And fin

Flatmate-Weathers' corset is finished, bound and eyeletted, with the exception of a modesty panel and a bag to put it in which will come later. I will take some much better photos when i have daylight, time and an appropriate length of corset lace.

Positives: Colours and fabrics work very nicely together, embroidery on the front panel lies smooth and flat, not too much puckering, neat bias binding, slimming effect from colours, good length.
Negatives: Strange thing going on around the bust channels - not quite sure what that is, slightly too high under the arms - its wearable but should be no higher than the top of the bra strap, there is some bagging on the lining - caused by using stretchy denim and the method of construction. This could be improved by pulling the extra fabric in each panel over their straightest neighbouring channel and tacking.

Wednesday, 7 July 2010


Flatmate-Weathers' corset is nearly done. Its not quite fully boned yet,and I still have to do the bias-binding around the top and the eyelets so it can be laced (it was being held by Weathers and her boyfriend Shum for the photograph).
I thought the differently coloured panels would have a slimming effect. But it took me by surprise by how greater an optical illusion it created.
I didn't have enough budget to buy fabric to make my own bias-binding, so I bought some pale pink satin ready-made stuff from John Lewis. I found the satin wasn't as nice to work with as the silk (not unexpectedly), but it does still look pretty, and picks out the pink colour in the flowers - in real life anyway. I must learn to take my pictures before it gets dark.

Monday, 5 July 2010

I like the other way better.


As far a I can tell so far from the little I know of corsetry, there are 3 methods of putting together a corset. There is the hand sewing way, sewing all the channels through al the layers then hand sewing the panels together. There is the sew everything together as you go way, which involves sewing the facing an lining panels together with the same seam working outwards from the centre front. And the last way, the way the book says. Seen as its what my book advises I thought I would try it, sewing all the facing panels together, all the lining panels together, then sew both sets together at the ends, turn inside out and sort out the channels.
So far I'm not very impressed, it definitely takes longer than my usual (on all the other two corsets I have ever made) method, and I don't think the results are as good. I cut out the fabric as accurately as possible, but the lining is still bagging. I am currently working on the steps for sewing in the boning channels, tacking stitches "in the ditch" at the panel joins. I went with the denim for the liner in the end, and the ever so slight stretch it has is not really helping either.

Sunday, 4 July 2010

Lining, a debatable concept

Today I unpicked and reworked the last of the embroidery for Flatmate-Weathers' corset, I'm glad I did because I'm so much happier with it now, the larger flowers look much less weedy and much more complete. I also cut out and mounted onto calico all the facing pieces, grey for the four front-most panels, and white for the rest.
Now the issue is, how to line it? I have some lovely fabrics lying around but they would all have to be mounted. On the other hand I have some fairly standard denim-like stuff which wouldn't need to be. It would work, but the inside wouldn't look as pretty. Decisions decisions...

Saturday, 3 July 2010

Finished the embroidery...or perhaps not


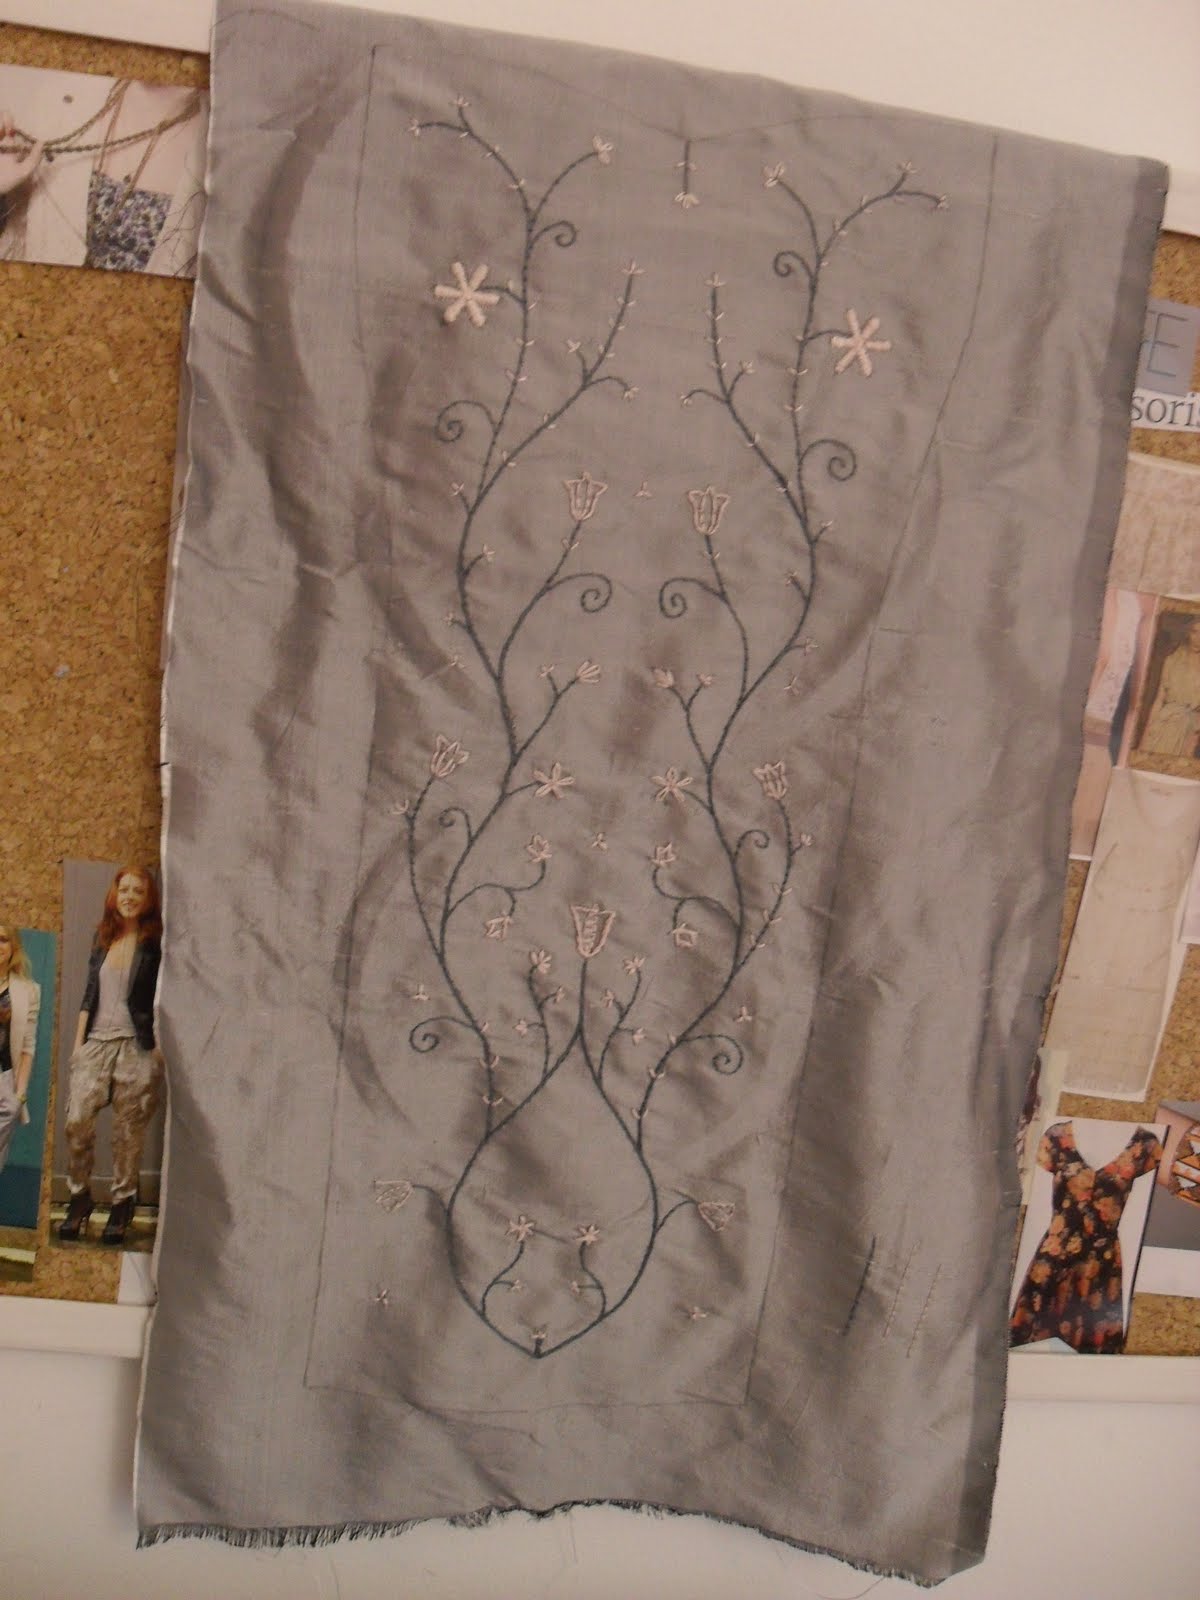
Well here is the "finished" front panel for Flatmate-Weathers corset. I am pleased with the stems, the buds, and the star-like flowers, but I'm really not feeling the tulip ones. I had a slight pink thread crisis half way through and had to go out and buy some more. But before that I tried to make it stretch further by using less strands. This made the flowers really weedy. I think I shall pick them out and start again.

Tuesday, 29 June 2010

Creeping along slowly


I did a little more on the embroidery today. I am pleased with most of. I used different numbers of threads in different areas. I think the three largest flowers, which I used only 2 threads for, look a little weedy compared to the others, so I will go back and pad them out a bit.
I spent the rest of the day being very computer-techy, I create a proper layout for this blog, and I made an online portfolio. I just need to remember to keep updating it with the new things I make.

Monday, 28 June 2010

I do love a good project

I went on a little shopping trip today, I do love fabric shopping, picking the type, the colour, the trims, bringing home the fresh little newly cut bundles, all ready to be made into something pretty.
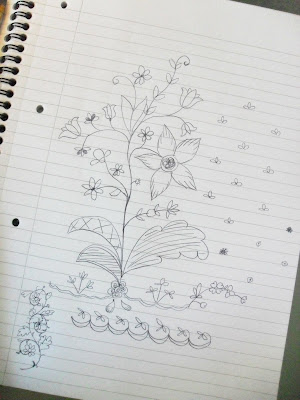
Today's shop was for Flatmate-Weathers' corset. She found this corset which she liked, with the panels in different colours and the flower details. I am hand embroidering the flowers onto hers, which was this evenings task. I am going for a vaguely 18th century based pattern. I got this book for my 20th birthday (last Saturday) from Denise and it is wonderful. Well worth reading by anyone interested in embroidery and historical costume, its very detailed and is full of detailed line drawings of sections of real 18th century embroidery.
I flicked through it and scribbled this page down with a combination of the different flower shapes and styles.
I then went though my embroidery threads to pick out some colours for the detail, though I did actually change my mind after I took this picture. I am using grey silk-dupion for the front 4 corset panels and a slightly off white silk-dupion for the rest. I am going to keep the embroidery on the grey only, keeping it towards the centre.
This is the design I came up with, I am going to keep to only a few colours, Flatmate-Weathers didn't want the flowers to be too dominating, so I kept it fairly simple.
I used my trusty light box and a pencil to trace the design onto the silk. I'm sure that is not technically the correct way to do it, but chalk made a line too thick, and carbon paper with a tracing wheel wasn't accurate enough.
I did a little sample of my chosen threads on the silk to check the colours. This was a good idea because it made me decide one of them didn't really work (its hard to show the colours properly in a picture). Thread often looks a slightly different colour stitched into the fabric instead of just being laid on top of it, so I will definitely be doing this again.
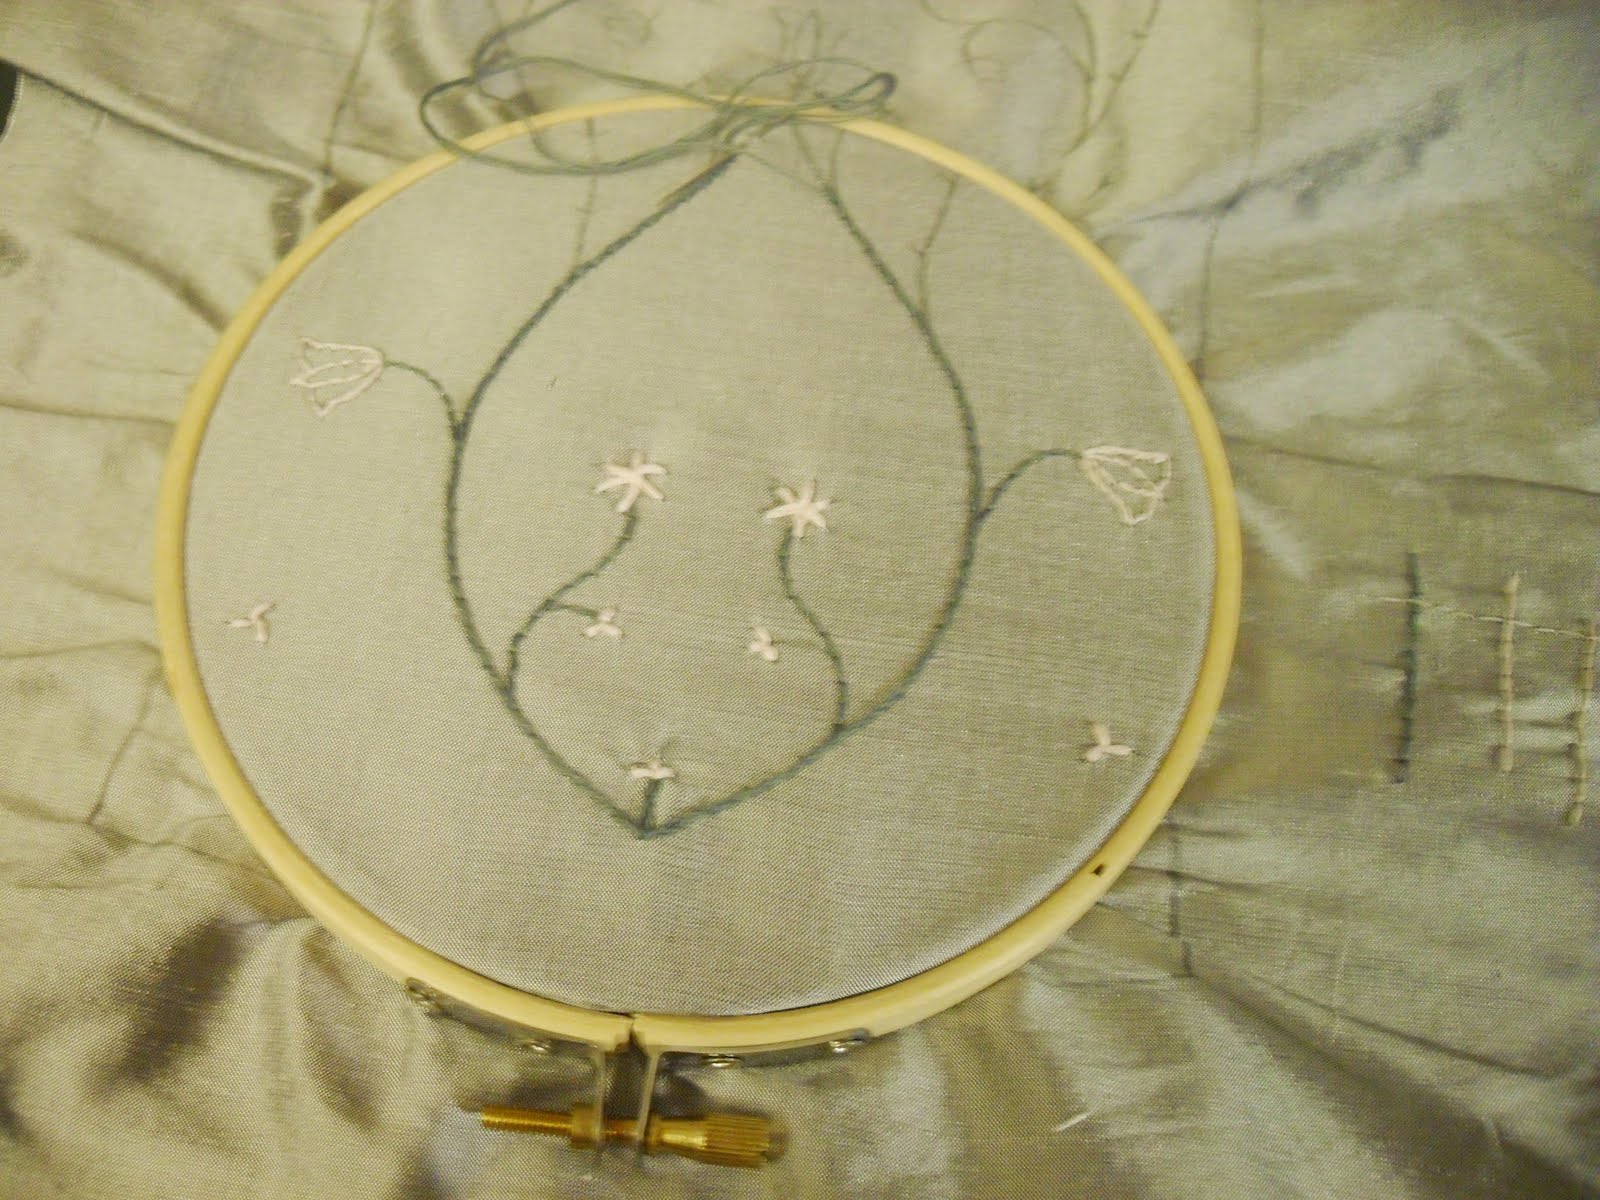
Then I began stitching. I'm using stem stitch for the main stem, and back stitch for the thinner offshoots. When I put the corset together I shall mount the silk onto calico. I wasn't sure whether to do the embroidery through the silk and calico together or just the silk. I couldn't come up with any really good reasons for one being any better or worse than the other, so I'm just sewing through silk. Mainly because it means I get to start the embroidery and put off the mounting.
This is how far I got this evening, I was slightly distracted by the amazing Mumford & Sons live set from Glastonbury. I want to get the corset finished before Flatmate-Weathers returns on Sunday...but I will have to see how it goes. I would rather do a good job than rush it.

Sunday, 27 June 2010

Flying Solo

So I have made a corset with a pattern, its now time to attempt the next stage, make a corset starting from the very beginning, the bare measurements. I have plenty of books neatly stacked on my shelf detailing exactly how I should have gone about this, but in the heat of the moment enthusiasm took over and I pretty much decided to wing it. So after lots and lots of ruler and biro, I ended up with something that looked vaguely like a corset pattern.
I ploughed on, and made it up into a toile, which much to my surprise fitted my guinea pig (Flatmate Wethers) pretty well. As far as I could tell anyway, it closed at the back, was smooth over the front, and didn't seem to gape anywhere that I could tell.
I would even go as far as to say it had the essence of corset about it.
I sewed channels for the boning from the seam allowance, I left 1.5cm seam allowance, which wasn't really enough, I was sewing right at the edge for the channels to be wide enough. Next time I will leave 2cm.
I used artificial whale bone for most of it, though I didn't have quite enough, and had to improvise with large cable ties in two places. You can see in the picture that the channels second from the centre are slightly narrower than the others. I read about using cable ties in one of my corset books, and I have to say they worked really well. I don't think I would use them for anything that would be worn a lot, or was under a lot of pressure, but for something like this, especially a toile, they worked just fine. And at 99p for 10 long ones, its greatly more student budget friendly than steels.
With the boning in the bust bagged out a bit (see picture), I found that taking in the panel third from the centre by about 2cm, sorted this problem right out.